A great creative workspace is more than a nice chair and a fast laptop — it’s the harmony between your desk and the accessories that live on it. If your streaming desk and laptop docking hub don’t match in size, cable routing, and power delivery, you end up with a tangled, unstable setup that undercuts the polished look you’re going for. This guide walks you through matching a streaming desk and a laptop docking hub so your creative workspace looks cohesive and functions smoothly, whether you’re recording videos, livestreaming, or just multitasking between creative projects.
What You’ll Need Before You Start
Before matching your streaming desk with a docking hub, gather the essentials so you can plan the layout properly:
- Your streaming desk (or the model you’re considering) with its dimensions and cable-management cutouts noted
- A laptop docking hub or dock, ideally with your target port count already decided
- A tape measure to check desk depth, grommet hole placement, and available under-desk clearance
- A list of the peripherals you plan to run through the hub (monitors, capture card, microphone, lighting, external drives)
- Velcro cable ties or a cable sleeve for tidy routing
Having this information ready prevents the most common mistake: buying a docking hub that looks great in photos but can’t actually reach your monitors or handle your power needs once it’s sitting on the desk.
Step 1: Define Your Creative Workflow First
Start by listing everything your workspace needs to support. A streamer running dual monitors, a capture card, and a ring light has very different hub requirements than someone doing photo editing with a single external display. Write down every device that needs a connection, then group them by type: display outputs (HDMI/DisplayPort), data (USB-A/USB-C), networking (Ethernet), and power (charging your laptop through the dock).
This workflow map becomes the backbone of every decision that follows — it tells you how many ports you actually need, whether you need dual 4K output, and how much wattage your dock has to deliver.
Step 2: Match Desk Size to Hub Placement
Streaming desks vary widely in surface depth, monitor arm compatibility, and built-in cable channels. Before choosing a docking hub, measure your desk’s usable surface area and note where any grommet holes or cable trays sit. A compact desk benefits from a small, vertical or magnetic-mount hub that tucks under the monitor rather than a wide horizontal dock that eats up desk real estate.
If you’re still shopping for the desk itself, browse a range of options built specifically for creator setups — cable routing, monitor arm mounts, and surface size all vary meaningfully between models. See our roundup of Streaming Desks for layouts designed with this kind of gear in mind.
Step 3: Choose a Docking Hub That Fits Your Power and Port Needs
Docking hubs range from simple 4-port USB-C adapters to full docking stations with dual 4K HDMI, Ethernet, SD card slots, and 100W+ power delivery. Match the hub to your actual workflow list from Step 1:
- Single monitor + basic peripherals: a compact 6-in-1 or 7-in-1 hub is usually enough
- Dual monitor streaming setup: look for a dock with dual HDMI or DisplayPort outputs and a dedicated power delivery port
- Heavy multitasking (video editing, large file transfers): prioritize USB 3.2 or Thunderbolt speeds and an SD/microSD slot for footage transfer
Compare models built for creator workstations in our guide to laptop docking hubs, which breaks down port counts and power delivery specs so you can match one to your desk setup rather than guessing.
Step 4: Plan the Cable Routing Path
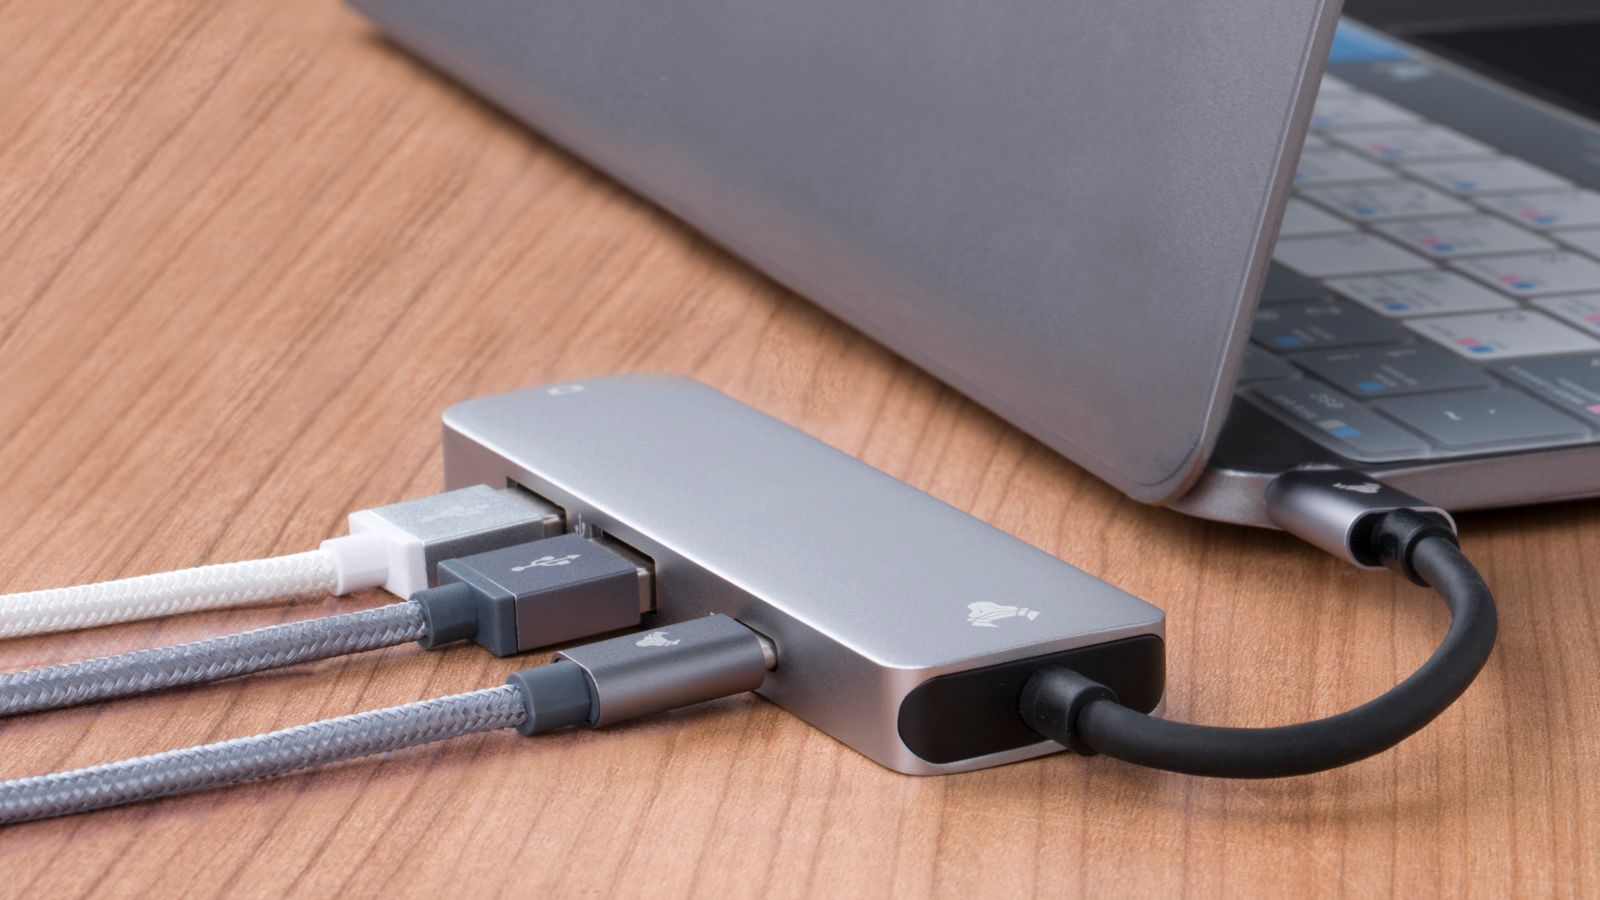
A cohesive setup isn’t just about matching hardware — it’s about hiding the mess. Once you know your desk and hub, plan the physical cable path:
- Position the docking hub near the desk’s built-in cable grommet or channel, not at a random edge
- Route the laptop-to-hub cable along the shortest practical path to minimize strain on the connector
- Bundle monitor, power, and peripheral cables together with velcro ties every 6–8 inches
- Use an under-desk cable tray or basket if your desk doesn’t already include one
- Leave a small service loop of slack near the hub so you can unplug and move the laptop without disconnecting everything
This step is what actually makes the desk and hub feel like one integrated system instead of two separate purchases pushed together.
Step 5: Test Under Real Creative Load
Before calling the setup finished, run it under the conditions you’ll actually use it in — start a stream, open your editing software, or run a full render while charging the laptop through the dock. Watch for two warning signs: the dock overheating or throttling power delivery, and any display flickering when multiple peripherals draw power simultaneously. Both usually mean the hub is underpowered for your workflow and needs a higher wattage or a different port configuration.
Step 6: Add a Secondary Surface for Overflow Gear
If your creative work spills into hands-on materials — sketching, mixed media, prop building, or craft projects alongside your digital setup — a single streaming desk may not have room for both the tech and the workspace. Many creators pair their streaming desk with a secondary table dedicated to physical materials, keeping cables and hardware fully separated from messier hands-on work. Our picks for best craft room tables are a useful reference if your creative workflow needs that extra surface.
Common Mistakes to Avoid
- Buying the hub before measuring the desk: a dock that looks compact online can still be too wide for a narrow desk surface or block a monitor arm’s clamp.
- Ignoring wattage requirements: a hub rated for 60W power delivery won’t properly charge a laptop that needs 90–100W under load, leading to slow battery drain during long sessions.
- Overlooking port order: plugging your most-used peripherals (microphone, capture card) into the farthest ports makes daily swaps more annoying than necessary — place frequently unplugged devices closest to the front.
- Skipping the cable plan: even the best desk and hub combination looks cluttered without a deliberate routing plan from the start.
Signs It’s Time to Upgrade Your Setup
Even a well-matched desk and hub combination wears out its usefulness eventually. Watch for these signs:
- Your current hub can’t keep up with a new capture card, second monitor, or higher-resolution display
- The desk surface no longer has room for new gear without overcrowding
- Ports on the hub feel loose or connections drop intermittently during streams
- You’re using multiple adapters or extension hubs just to reach enough ports — a sign your original hub is undersized for your workflow
When any of these show up consistently, it’s usually cheaper in the long run to upgrade the hub or desk than to keep patching the setup with extra adapters.
Frequently Asked Questions
Do I need a docking hub if my streaming desk already has USB ports?
Built-in desk USB ports are convenient but usually limited to basic USB-A data or charging, not full display output or high-speed data transfer. A dedicated docking hub is still worth adding if you’re running monitors, a capture card, or high-resolution footage transfers.
How many ports should my docking hub have?
Count every peripheral in your workflow list, then add one or two extra ports for future gear. Most creators are comfortable with a 7- to 10-port hub covering display, USB-A, USB-C, Ethernet, and card reader slots.
Can I mount the docking hub under the desk to save space?
Yes, many hubs are compact enough for a Velcro or magnetic mount under the desk surface. Just make sure the mounting spot still allows easy access for plugging in a laptop daily.
What’s the best desk size for a streaming and docking hub setup?
A desk depth of at least 28–30 inches gives enough room for a dock, monitor arm base, and keyboard without crowding. Wider desks (55 inches or more) are ideal if you’re running dual monitors alongside the hub.
Will a docking hub slow down my laptop’s performance?
A properly matched hub shouldn’t cause noticeable slowdown. Performance issues usually trace back to an underpowered hub, an outdated USB standard, or too many high-bandwidth devices sharing the same port.